Xeryon LabVIEW
Controlling our stages in LabVIEW is very easy thanks to our LabVIEW library. This library handles all the communication between the computer and the controller. It also provides simple functions to control different stages. The library is compact and easy to use, and you can use it for as many stages as you want. Let’s take a look.

Controlling a stage
To control a stage, you first need to config some settings. First, you have to place the correct settings_default.txt file in the same folder as the LabVIEW library. The settings_default.txt that’s already included is just a sample file, this one will not work. If you haven’t done this step, please look first at the section below “First time use”.
After this, you can open the LabVIEW example. There are 3 example files: 1 stage / 2 stage, and 3 stages. There is no difference (anymore) between a linear example file and a rotating example file. If you want to use more stages, you can easily copy the components in the example files.
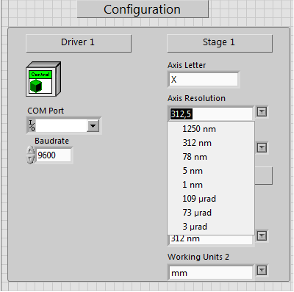
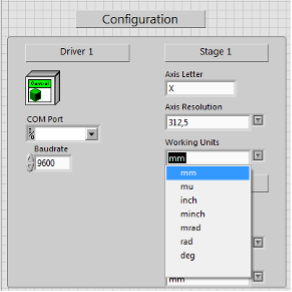
Now, before running the file you should fill in the tab “Configuration”. Start by selecting the right COM-port and preferred baudrate. After that, for each connected stage you fill in it’s axis-letter. If you have just one stage, just use “X”. After that, select the correct resolution and the working units you want that stage to work in. Here the difference is made between a rotating and a linear stage. These two steps can be seen on the image below.
Now you can run the VI and start using the system. Start by pressing “Find Index”, this will cause the stage to move and find its reference position. From then on, the system knows it’s absolute position. Then you can move the stage to any position you want by pressing the respective button.
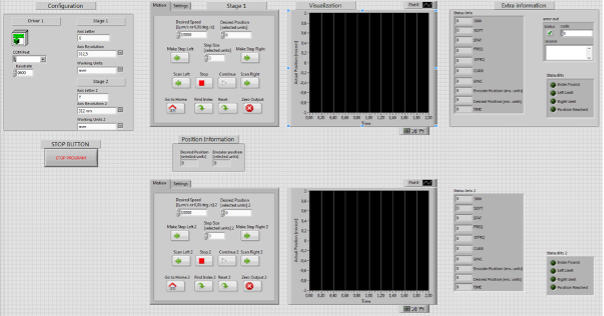
An example with 2 stages:
First-time use
When you first use the LabVIEW code, you need to make some changes to the “settings_default.txt” file we provided you. Make sure you use the settings_default.txt file that’s provided with the Windows interface, copy that one and (re)place it in the folder with the LabVIEW code. Then open that file, and remove any lines containing “%” and everything that’s after “%” on that line. Another thing you need to is search for all lines containing “MSPD” or “SSPD” and multiply that corresponding value with: 1000 for a linear stage, and 100 for a rotating stage.